Rats nest! That's what the wiring looks like when I soldered all of the leads to the buss bars. It's a good thing that this doesn't show. The soldering was very easy. I cut the leads to the proper length, tinned them, applied a dab of solder to the buss, and then heated the solder while touching the wires to the buss.
This is a view from below where I ran the supply wire up through the center. Notice that I added a strain relief by splitting the wire, running a piece of 3/16" square wood through and hot gluing it to the inside of the structure. Once the roof is permanently installed it would be a problem if an accidental yank of the supply wire pulled it loose from the buss!
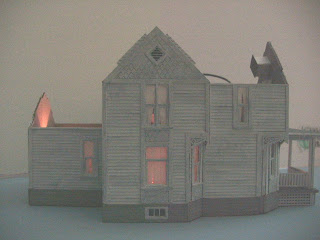
These next few pictures were taken with the room lights off to give you an idea of what the structure will look like when lighted. The pictures were so dark I used my graphic editing software to lighten them, thus the reason they are so grainy. Keep in mind that adding the roof will make the lights look brighter because of the reflection inside of the roofing. The good news is that the supply voltage can be reduced to lower level that looks good. You might even want to have a dual level - full 12 volts for "daylight" viewing when the train room lights are on, and a reduced voltage - say 6 volts when the train room is dark.
Another angle.
And another angle. By the way, I purposely light the front door area brighter to draw the eye to the door since you can see through the screen door and see the hall clock.
Next up it will be time to add the roof. I've got to coat the wood with some sealer and let it dry overnight before proceeding.


Awesome! You realize you're going to make me have to light the whole layout now right? ;) Outstanding Rick!
ReplyDeleteLOL!
ReplyDeleteKevin,
You could just claim that part of your layout world had a blackout while Grandpa Sam's is powered from a different power grid.
Rick